
15 May 2012
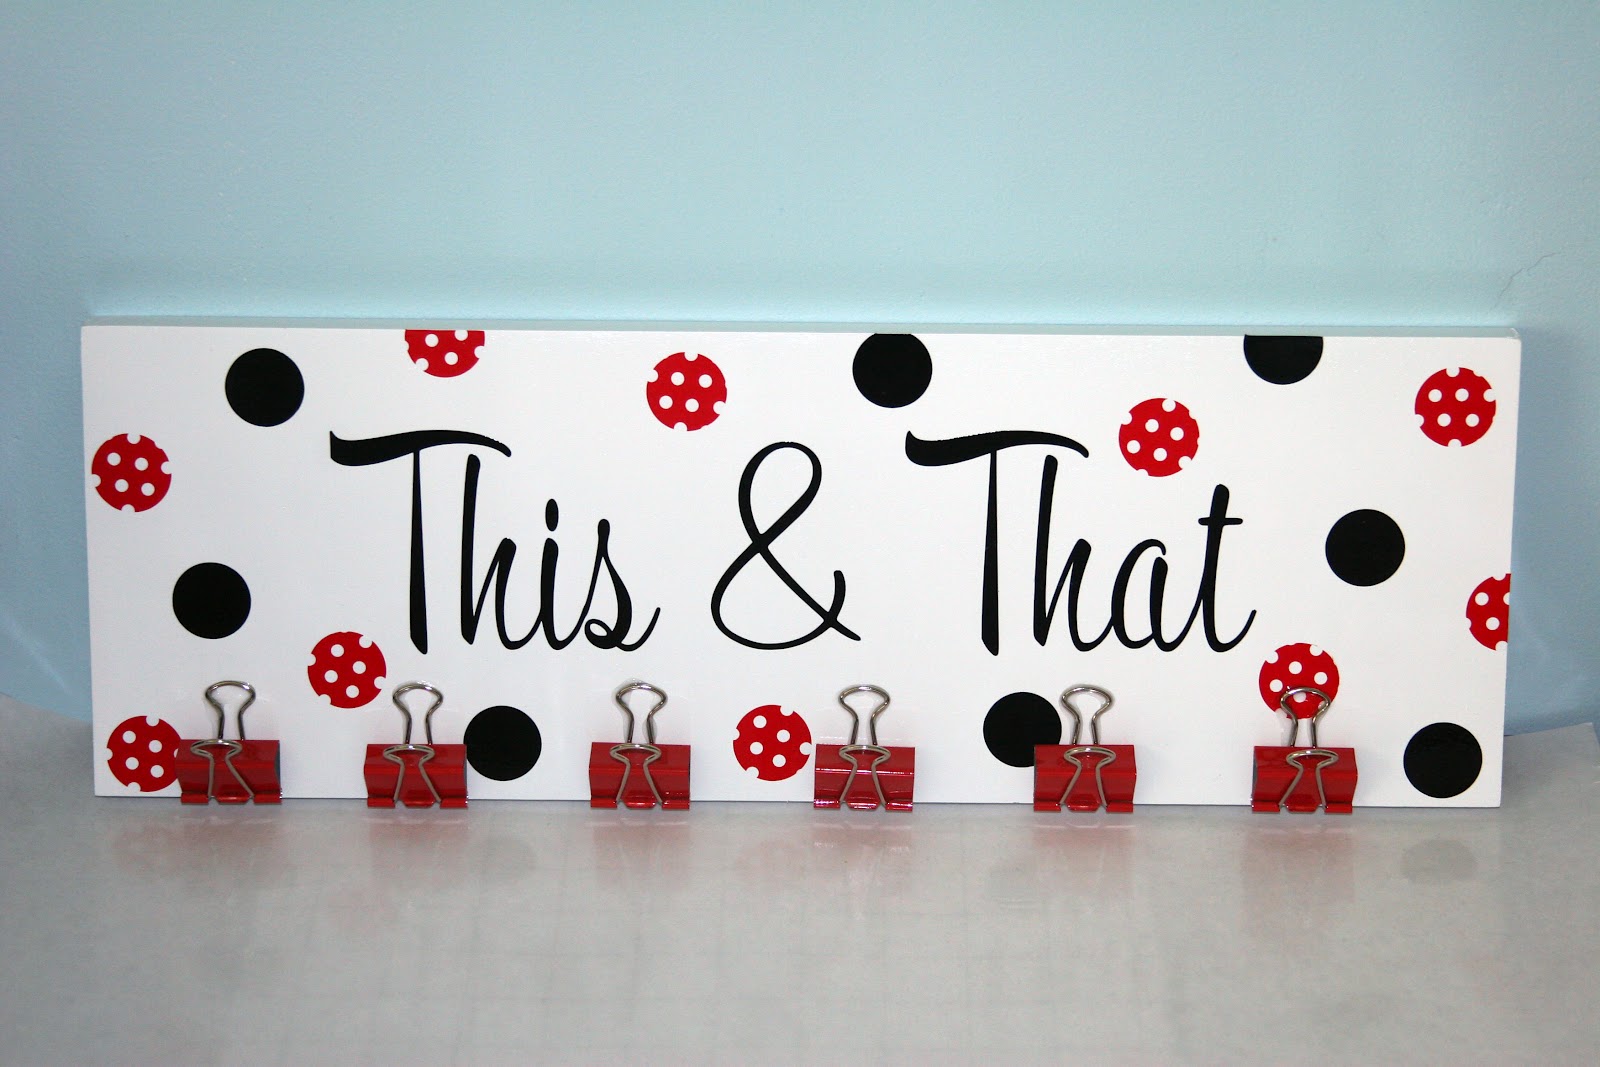
This and That board
05 March 2012
St. Patties Day Pot O Gold
I used three different SVGcuts.com files to create this super cute Pot O Gold with Leprechaun and rainbow! I used the Party on Elm Street SVGcuts.com set for the pot o gold and I embossed the pot with the Polka Dot Embossing Folder.
The Leprechaun is actually the Pilgrim man from the Autumn Cuddly Friends svg set.
The rainbow is from the Charm and Chance svg set. I used a piece of wire to attach the rainbow to the pot (I also hacked off the pot of gold that was part of the rainbow)
I filled my pot o Gold with Leprechaun gold (the kind that disappears after a while! LOL) This was a fun project and it looks great as a super cute St Patties Day decoration, Jeremy is loving it, although I think that has more to do with the Leprechaun "gold" than anything else! LOL
The Leprechaun is actually the Pilgrim man from the Autumn Cuddly Friends svg set.
The rainbow is from the Charm and Chance svg set. I used a piece of wire to attach the rainbow to the pot (I also hacked off the pot of gold that was part of the rainbow)
I filled my pot o Gold with Leprechaun gold (the kind that disappears after a while! LOL) This was a fun project and it looks great as a super cute St Patties Day decoration, Jeremy is loving it, although I think that has more to do with the Leprechaun "gold" than anything else! LOL
02 February 2012
Snail Mail Box (My Scrap Chick)
I used the mailbox file from My Scrap Chick to create this super cute Snail Mail box! The snail is from the My Scrap Chick Critter Books set and I used Make-the-Cut to create the "Mail" wordart. I inked the edges of the snail to add interest and dimension. I used a brad to attach the flag. This is a sturdy mailbox and so super cute!!!
**editing to add that the font I used to create the "mail" word-art was "Mail Ray Stuff" it is a free font and I included the link to it on Dafont.
30 January 2012
Jukebox (svgcuts.com)
Welcome back everyone and I am glad to be back too!
Some of you know (My Facebook Friends) that I started a small vinyl craft business, in October I did my first craft show and I was so busy that I had no crafting time. After the holidays my creative mojo went of vacation! I finally made myself get back into the craft room and this is the first thing I made! This is the 3D Jukebox from the Brand NEW Rockin and Rollin kit from svgcuts.com. Mary has really out done herself and I am going to be making the record box too (I seriously LOVE the dice and glasses) I did the vellum version and I cut my vellum out of the white style vellum and used Alcohol ink in silver to color it, you can still see the battery operated tealight through the vellum. I used a gray paper for the body (to simulate chrome or aluminum) and then did a black and pink theme that is so typical 50's. I just loe the way it turned out and so does my almost three year old (His birthday is Friday 3 Feb.) He kept saying Wow, Wow LOL . Please leave me a comment and let me know what you think!! I will leave you with a few more views from different angles!
22 November 2011
Cuttin Up With Class Family Challenge
I made a Christmas card using the Stick Figure Family Cut Files. The little girl and boy are only two of a large family set designed by Jani from Paper Compulsions. You can get the basic family for free when you take part in our challenge over at Cuttin Up With Class and you can get an add on pack of their clothes and accessories from jani's ETSY store. I used Peachy Keen's "Basic Paper Doll Face Assortment" stamps for the faces. The tree on my card is from My Scrap Chick's "Christmas Cuties" Cut Set and I used stick on jewels for the ornaments. The sentiment is from Scrappy moms "A Holiday to Remember" stamp set. I also want to wish all of you a very Happy and Blessed Thanksgiving!!
15 November 2011
Joy's Life Wintery Puns stamps
Check out Joy's newest stamp set!! I have ordered mine and I can't wait to start playing with it!! I have a Bunch of card ideas already! LOL Run over to Joy's Life and order yours today!!
08 November 2011
CUWC Thanks Challenge and a Free svg file!
I took some creative license on this challenge! I decided that, instead of creating a tag or card to put on a Thank You gift, I would create the gift itself! I had the small jar candles that I bought at Walmart and I used the leaf file from the challenge a few weeks ago. I cut the leaf in brown vinyl and then I created the "give" to go with the "Thanks" file that is part of the challenge this week. You can download the svg of "give" HERE. I also tied on some raffia to complete the gift and I will be giving these to a friend who helped me out recently! Go over to the Cuttin Up With Class site and grab your Thanks cut file and create your own Thanks, card, tag or gift and upload it to be in the running for a cool prize!!
01 November 2011
CUWC Scarecrow Challenge Card
The challenge this week over at Cuttin Up With Class is using this scarecrow file, in either the cut form or the digi stamp version. This scarecrow is so cute and I have a lot of fun piecing him together. I added some pen work with the stitches and a Peachy Keen face stamp for the face. The stamped sentiment is from Scrappy moms. Go over to the Cuttin Up With Class blog and grab your files, create your own work of art using the files and link it up!
27 October 2011
DigiStampCafe.com digi stamp cards
Here are a couple of cute simple cards that I created using Digital Stamps from Digi Stamp Cafe these digi stamps are created by the same folks who are behind My Scrap Chick. You all know I adore My Scrap Chick so I am loving these digi stamps! Please go and check them out and the new website Digi Stamp Cafe.
25 October 2011
Fall Leaf Votives
Fall Leaf Votive
** several folks have asked if the votives are washable, I did a quick test and it looks like if you hand wash, gently, and hand dry they are washable. I did not have any of the alcohol ink come off when I did a test wash.**
I created two fall votives for A Craft Junkie Too Design Team project last year and I wanted to repost them because I have many new followers and recently a new Friend was telling me about these fabulous votives she saw on a blog last year and I had to laugh because they were mine! I love the way they turned out. I created a video so you can see how I made these. They are quick, simple and inexpensive. I am linking these up to the "link up" party over at Cuttin' Up With Class so y'all create your own set and link them up too!! :-)
Please forgive the choppiness of the video, it was over 18 minutes long so I had to get it under the 15 minute limit and I am still learning how to edit! If anyone makes one please let me know, I would love to see them!


Please leave me a comment letting me know what you think, I love comments and I will confess to constantly checking for them! So, come on and make my day by leaving me a comment!!Thanks,
Tammy
21 October 2011
Little Scraps of heaven Halloween party Blog Hop
Hello, Welcome to the Halloween Party Blog Hop
We are so glad that you have decided to hop along with us.
Throughout our hop we hope to inspire you with lots of ideas for hosting
your own Halloween Party.
There will be some great blog candy along the way as well as a
GRAND PRIZE GIVEAWAY of $100.00 in cash (which is a big
chunk of change to buy goodies for a Halloween Party)
If you just happened upon my blog and would like to start at the beginning please hop on over to
LEANN'S BLOG
If you have been following the blog hop and have hopped over from Deborah's Blog
Then you are right where you need to be.
I created these fabulous cupcake thrones, I absolutely stole the idea from Ruthie (Thanks Ruthie!!) The templates are available HERE for the cupcake throne. I used 4 of the characters from the Ghoulishly Cute Collection and the sentiment stamps are from Scrappy Mom's stamp set "A Haunting We Will Go". I baked the cupcakes and my 2 year old was so excited, I thought I would never get him to bed after all of that sugar! LOL Don't forget to leave a comment to be in the running for the Grand Prize Blog Candy!!
Your next stop is Angie's Blog and here is the entire list just in case you get lost along the way! have fun hopping!
Blog Lineup
Leann http://scrapbookingbyleann.blogspot.com/
Patricia http://pattyandcharlie.blogspot.com/
Wendy A. http://scrappydownunder.blogspot.com/
Wendy L. http://wleitel.blogspot.com/
Nancie http://alittlepieceofmebynancie.blogspot.com/
Margaret http://auntmargaretdesigns.blogspot.com/
Emily http://createserendipity.blogspot.com/
Jeana http://www.scraptoday.blogspot.com/
Deborah http://www.scrappingmamma.net/
Tammy http://tammyjennings.blogspot.com/
Angie http://capzscrapzcreationz.blogspot.com/
Cindy http://cpmemories.blogspot.com/
Dawn http://dawnsdesignsthatdelight.blogspot.com/
Tricia http://lshdesigns.blogspot.com/
SVGcuts.com 3D Haunted House
This 3D haunted House was SO much fun to make! :-)
It is part of SVGcuts.com's Elmhurst Hollow SVG Kit. I used textured black cardstock for the main body of the house and some patterned orange from an K & Co. Halloween stack. I added a spider brad, some distressing with Tim Holtz Black Soot distressing ink, and red vellum to the windows. In the back you can place 3 battery operated tealight candles and it is gorgeous all lit up (I did try to take a photo of it lit but they just didn't turn out well.) I used floral wire that I sharpie markered black to attach the bats so they appear to be flying. I am very happy with the way this turned out and it was fairly easy too!
20 October 2011
Cuttin Up With Class Challenge #4
Y'all, I am so sorry that my post is so late, I have had a time getting this post up! I was also late because I had my weeks all messed up and I am crazy making stuff to sell at two craft fairs I am participating it in November.
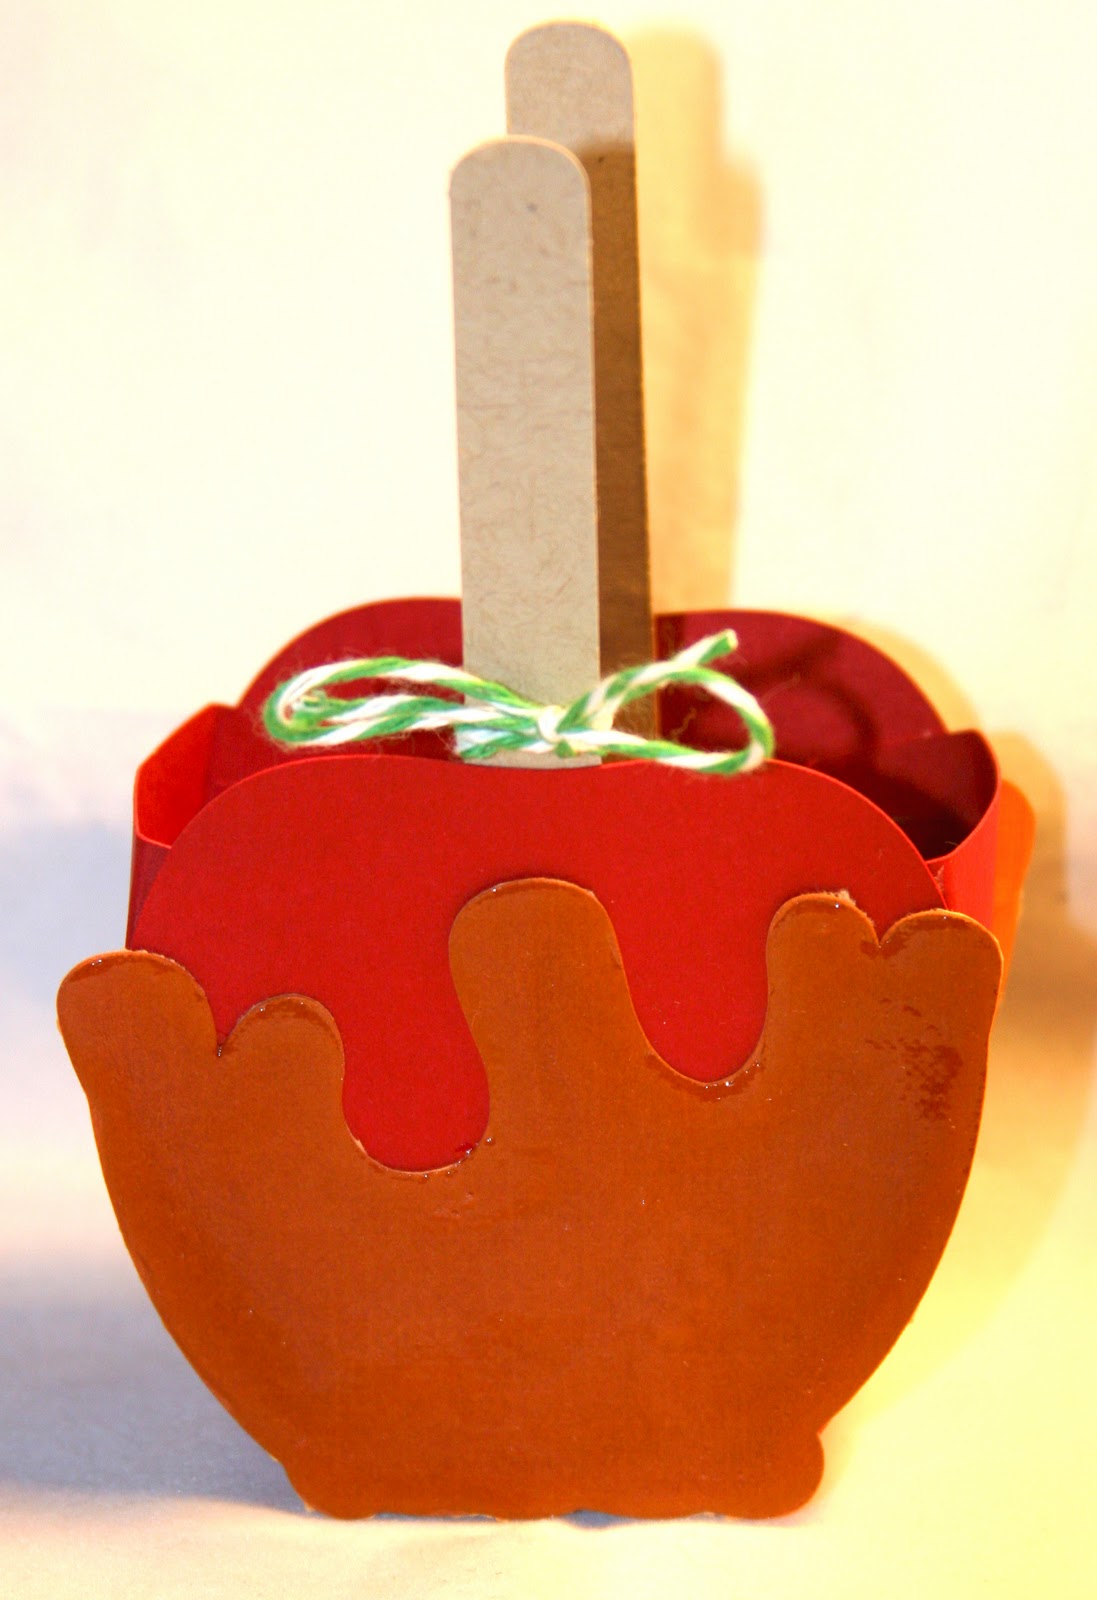
This super cute Caramel Apple Goodie Box was created by the fabulous Jani! I used glossy Accents on the caramel to give it extra dimension. (it is hard to see in the photo) I tied a bit of Trendy Twine around the stick and filled it with Halloween Hershey's Kisses. This weeks Challenge is greatly varied so please go over to the Cuttin Up With Class site and check it out, create a project and link up!! Thanks.
12 October 2011
Happy Fall Y'all - My Scrap Chick
Happy Fall Y'all!! I made this card with My Scrap Chick's new collection "Harvest Kids". I used two patterns out of the collection, the fence and flowers set and the Boy #2 set. There are 11 different patterns in the collection and you can easily mix and match them. I used Tim Holtz distressing ink to give this a more distressed look, a bunch! of pop-dots and some white gel pen stitching and accents here and there. The face is a Peachy Keen face from their "Simple Simons" set and the sentiment is from Scrappy Moms "The Charmed Life" stamp set.
11 October 2011
Cuttin Up With Class Challenge #3 ~ Fall Leaf
To create this Fall card I used the Maple Leaf pattern from Jani. I created a shadow in MTC and duplicated it, mirrored one of the pieces, bumped the two pieces together added a rectangle basic shape (to make the folded area slightly larger) and then welded to make my card base. I then cut the leaf shape out of a pretty fall patterned paper and the vein layer out of brown paper. I assembled my pieces and then pop-dotted the leaf to the card base. (oh, I forgot to say that I used Time Holtz Distress inks to distress the Kraft paper on the card base) I added some Cinnamon Stickles on the vein layer and then added a Copper bow, a wooden button and some twine. The inside says "Happy Fall". Please go over to Cuttin Up With Class , grab you free file (which includes both this leaf and an oak leaf) and participate in our challenge!!
10 October 2011
5 Cards using My Scrap Chick Kawaii files
My Scrap Chick just had a Facebook Challenge using their Kawaii files. I made 5 cards using 4 different files.
This card is made using the Kawaii Fruit Stand Collection, some Trendy Twine and a Joy's Life "Yummy Puns" Stamp.
This card is made using the Kawaii Food Vol. 1 and the bracket shaped card and mat are from the My Scrap Chick's 30 Boxes and More set (the 30 boxes and more set is a MUST have set, there are so many fabulous patterns in this set!)
I made this card using the My Scrap Chick Kawaii Food Vol. 1 and a stamp from Joy's Life "Barnyard Puns" stamp set. I added a bow and some stitching and I was all done with this simple card!!
This card is so cute! LOL I used the lettuce file from the My Scrap Chick kawaii Food Vol. 1 . I added some Trendy Twine and the sentiment is one I created myself and printed, I used my Cuttlebug to give the background some dimension.
This card was made using the My Scrap Chick Kawaii Sweet Shop set The cobweb paper is from Echo Park's Apothecary Emporium Paper Collection, the twine is from Divine Twine and the sentiment is from Scrappy mom's. I also used the Martha Stewart cobweb border punch .
09 October 2011
Retro Crazy Daddio Card
Isn't this just the fun-est card ever!! LOL I LOVE it. I used the Lettering Delights "Hipsters" Cut-it set. I used a background paper from the DCWV Mod Retro stack and the brick paper is from the same stack. I used some metallic papers and some Crystal Effects on the body of the Base Cello. (I think that is what the instrument is, I am not musical other than listening and singing badly! LOL) My Aunt wants this card to send to a Friend of hers! I am considering parting with it! I guess I can make another one! LOL
Here is a close up of the instrument body.
08 October 2011
Halloween Candy or Gift box
Isn't this fabulous!! This box is a My Time Made Easy file "That's A Wrap" , I just love Lauren's files, they are so original and easy to assemble with fabulous directions. The paper is from my stash except the cobweb paper, that is Echo park (I buy the digital version and print my own as I need it) The tag is from My Scrap Chick and the Stamped sentiment is from Joy's Life's "Holiday Occasions" Stamp Set. I inked the edges of the cobweb paper and the ribbon is from Wal-mart, the spider is a brad from my stash (sadly it is the last one I have!) Here is one last pic of it all filled up with Halloween (or Fall) Hershey Kisses.
04 October 2011
Cuttin Up With Class Challenge #2
The challenge this week was to use a super cute mask file created by the fabulous Jani! I made my card using the mask svg and the super cute skeleton guy is from Lettering Delights "Spooky Soiree Cut-its" and the witch hat is from the Lettering Delights "Witch One Cut-its Set". The pumpkin bag I made using last weeks pumpkin file, I boolean joined a circle from basic shapes to make it look like a Halloween bag. I joined a face from the DB Jack-O-Patterns font I added some halloween Orange Licorice Trendy Twine for the handle. The background paper is a digital paper that I printed out onto the Georgia Pacific white cardstock that I buy at Wal-Mart, it is from the Lettering Delights "Best Witches" Paper Pack. The glitter paper is from a Martha Stewart Halloween stack I bought at Michaels and the sentiment is a Joy's Life stamp from her Holiday Occasions stamp set, I hand drew on the spider hanging from the N. I hope y'all get some inspiration from my Trick-or-Treating Skeleton Witch and please go over to the "Cuttin Up With Class" blog and grab your mask file and play along with us!!
01 October 2011
World Card Making Day Blog Hop
Happy World Card making Day!!! Go make a card, after you hop, of course! If you have arrived here from the super crafty Melissa's Blog then you are in the right place! If you just stopped by, Welcome!! :-D and you might want to start at the beginning so you don't miss a single Fabulous project!!
I made two cards for your viewing pleasure today.
I used an burnt orange card base and the accent paper is from Echo Park's Apothecary Emporium Collection (I buy the digital versions at Jessicasprague.com ) The Witch is from Scrappin Bug Designs "Witches N Potions" set, I used a Sizzix Cracked Glass embossing folder on her skirt and a Peachy keen Face, I also added some Stickles on her hat brim and some inking to highlight the details. The cool frame is from Echo Park's svg "Oval Frame" in their Apothecary Emporium Collection available at idiecut.com. The super fabulously COOL Oct 31st is a Joy's Life stamp from her Halloween Puns stamp set.
Amanda -http://amandascraftsandmore.blogspot.com/
Jin - http://underacherrytree.com/
Jovan - http://www.cardsbyjovan.com/
Julie- http://www.cricutchick.blogspot.com/
Kyle - http://thegreencricut.blogspot.com/
Margie - http://bellabugcreations.blogspot.com/
Martha -http://pattisscrapingtime.blogspot.com/
Melissa -http://melissa-moecreations.blogspot.com/
Tammy - http://tammyjennings.blogspot.com/
Theresa - http://www.thescrapbookingqueen.com/
I made two cards for your viewing pleasure today.
I used an burnt orange card base and the accent paper is from Echo Park's Apothecary Emporium Collection (I buy the digital versions at Jessicasprague.com ) The Witch is from Scrappin Bug Designs "Witches N Potions" set, I used a Sizzix Cracked Glass embossing folder on her skirt and a Peachy keen Face, I also added some Stickles on her hat brim and some inking to highlight the details. The cool frame is from Echo Park's svg "Oval Frame" in their Apothecary Emporium Collection available at idiecut.com. The super fabulously COOL Oct 31st is a Joy's Life stamp from her Halloween Puns stamp set.
My second card uses this super cute Frog from the Digi Bistro's "Hoppy Little Frogs" SVG set, the witch hat (I Stickled this for the bling) and the moon and bat are from the Digi Bistro "Pick Your Poison" SVG set and the two bats on the left side are from the Digi Bistro "Halloween Town" SVG set, these bats look a little funny in the pic, they are covered with Martha Stewart Glow-in-the-dark glitter and they really glow (I tried to take a pic, but it didn't work) The sentiment is from Joy's Life's "Halloween Puns" Stamp set, I embossed this with Zing embossing powder.
Your Next stop is the Fabulous Theresa's Blog and I am posting the entire line up if you get stuck along the way! I hope y'all like my halloween Cards that I made for World Card Making Day and please leave a comment to be in the running for a little something (to be determined! LOL Can you tell I have had a week!)
Joy - http://www.joyslife.com/Amanda -http://amandascraftsandmore.blogspot.com/
Jin - http://underacherrytree.com/
Jovan - http://www.cardsbyjovan.com/
Julie- http://www.cricutchick.blogspot.com/
Kyle - http://thegreencricut.blogspot.com/
Margie - http://bellabugcreations.blogspot.com/
Martha -http://pattisscrapingtime.blogspot.com/
Melissa -http://melissa-moecreations.blogspot.com/
Tammy - http://tammyjennings.blogspot.com/
Theresa - http://www.thescrapbookingqueen.com/
Subscribe to:
Posts (Atom)